If you keep a saltwater reef aquarium — a tank filled with live coral, fish, and the carefully balanced ocean water they need to survive — you’re fighting an invisible enemy every single day: evaporation. Water evaporates from your tank constantly, but the salts and minerals dissolved in that water stay behind. The result is that your water gets progressively saltier and more concentrated as each hour passes. That concentration shift doesn’t just affect salinity (the amount of dissolved salt in the water); it also changes alkalinity, which is the water’s ability to resist swings in pH. For coral, alkalinity is life support. A stable alkalinity reading — most reef keepers target 8–10 dKH (degrees of carbonate hardness, the standard unit for measuring this buffer) — is the single biggest factor in whether your coral grows or slowly bleaches. This article explains why evaporation is the root cause of most alkalinity instability, how an ATO (automatic top-off system, a device that automatically replaces evaporated water with fresh RO/DI water) solves the problem, and how to pick the right one for your tank size and chemistry goals.
Why Evaporation Is a Chemistry Problem, Not Just a Maintenance Chore
Most newer reef keepers treat evaporation as a nuisance — top off the tank, move on. But once you start testing alkalinity daily, the pattern becomes obvious: your dKH reading is almost always highest first thing in the morning (after a night of evaporation with no manual top-off) and lowest right after a large manual water addition. That daily swing is your coral’s worst enemy.
Here’s the mechanism. Seawater’s major ionic relationships are tightly coupled. When water volume drops, the concentration of every dissolved compound rises proportionally — calcium, magnesium, and carbonate (the building blocks of alkalinity) all climb together. When you then add a large slug of fresh RO/DI water to compensate, those same parameters drop quickly. Coral skeletons are built from calcium carbonate, and the enzymatic processes that deposit that skeleton are calibrated to a narrow alkalinity window. Per Advanced Aquarist’s overview of alkalinity in reef systems, even a 1–2 dKH daily swing can measurably slow calcification rates in Acropora and other small-polyp stony (SPS) corals — the high-demand species that dominate premium reef builds.
The fix sounds simple: replace evaporated water in small, continuous increments rather than large manual doses. That’s exactly what an ATO does.
How an ATO System Actually Works
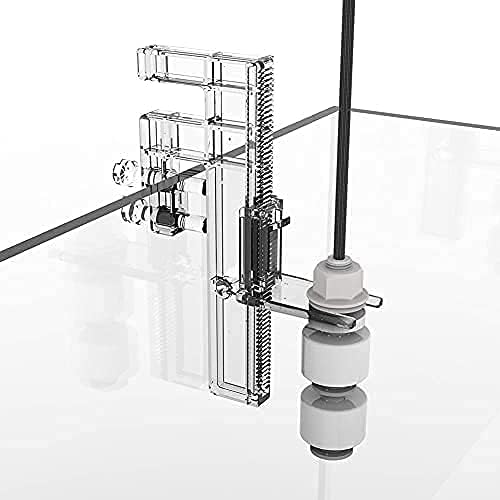
An ATO system has three core components: a sensor that detects when water level in the sump (the separate filtration chamber beneath the display tank) drops, a pump or valve that moves fresh top-off water when triggered, and a reservoir that holds the RO/DI (reverse osmosis / deionized) water you’ll be adding.
The sensor is where designs diverge most significantly, and it’s where your reliability lives or dies.
Float switches are the oldest approach — a mechanical float that opens or closes an electrical circuit as water level changes. They’re inexpensive and proven, but they can stick, especially in sumps with surface agitation or salt creep. Reef2Reef community threads consistently show float switch failures as the most-cited cause of ATO-related floods or overdosing events.
Optical sensors use an infrared beam to detect the water surface without moving parts. They’re faster to respond and far less likely to stick, but they can give false readings if the sensor lens gets coated with salt spray or algae. Most mid-range and premium ATO units have moved to optical sensing as the baseline.
Dual-sensor setups use two sensors at slightly different heights — one as the primary trigger, one as a failsafe cutoff. If the pump runs longer than expected and water reaches the upper sensor, the system shuts down and alarms. This architecture is the standard for any tank over 50 gallons where an unchecked pump could cause a significant overflow.
By the numbers — ATO sensor tier comparison:
| Sensor type | Failure mode | Best fit | Typical price tier |
|---|---|---|---|
| Single float switch | Mechanical sticking | Nano tanks, budget builds | $20–$50 |
| Single optical | Lens fouling | Mid-size freshwater/FOWLR | $50–$100 |
| Dual optical + controller | False-positive flood risk | Reef 40 gal+ | $100–$200 |
| Controller-integrated (Neptune, GHL) | Software/probe dependency | SPS / high-value builds | $200–$500+ |
Matching ATO Spec to Your Tank’s Evaporation Rate
Before you pick a unit, estimate your daily evaporation. A general rule of thumb cited by Practical Fishkeeping in their marine tank maintenance guides: an open-top reef tank evaporates roughly 1–2% of total water volume per day under typical home conditions (ambient temp 68–75°F, no fan-driven evaporation chilling). A tank with a chiller-driven fan or a high-flow skimmer neck can push that to 3–4% daily.
For a 75-gallon display with a 20-gallon sump (95 gallons total system volume), that’s roughly 1–2 gallons per day under normal conditions. Now check the ATO reservoir you’re planning: a 1-gallon reservoir needs refilling daily, which defeats the purpose of automation. A 5-gallon reservoir gives you 3–5 days of hands-off operation. A 10-gallon brute trash can or dedicated ATO container gets you a week-plus, which is what most intermediate reef keepers are actually targeting.
Pump head height matters too. Your ATO reservoir often sits on the floor or in a cabinet well below the sump waterline. Check the manufacturer-rated maximum head pressure (the vertical lift the pump can push water against) before assuming the unit will work in your stand configuration. Several popular budget ATOs are rated for only 3–4 feet of head — adequate for most setups but a real constraint if your sump is elevated on a rack or the reservoir is on a lower shelf.
ReefBuilders’ roundup of ATO hardware specifically flags this: “budget units with undersized pumps are a frequent source of intermittent top-off failures in taller stand configurations, where the pump works hard enough to shorten motor life.”
The Chemistry Connection: ATO Alone Isn’t the Full Answer
Here’s the tradeoff that experienced reef keepers discover around the 12-month mark: an ATO stabilizes salinity and buffers the concentration-swing effect on alkalinity, but it doesn’t add alkalinity back to the system. Coral is actively pulling carbonate out of the water column every day to build skeleton. Your ATO replaces the water volume, not the chemistry consumed.
This means the ATO is the foundation layer of a multi-part dosing strategy:
Layer 1 — ATO: Maintains consistent water volume and salinity, eliminates evaporation-driven concentration spikes. This is the minimum viable setup for any reef tank.
Layer 2 — Two-part dosing or a calcium reactor: Actively replenishes calcium and alkalinity consumed by coral growth. Two-part dosing (dripping separate calcium and alkalinity solutions into the sump on a scheduled pump) is the most common approach for tanks up to around 150 gallons. A calcium reactor (a chamber that dissolves calcium-carbonate media using CO₂) becomes more cost-effective at higher coral densities.
Layer 3 — ICP testing or full parameter monitoring: Quarterly ICP (inductively coupled plasma) water testing — a lab analysis that identifies trace element drift — catches the slow depletion of magnesium, strontium, and other elements that two-part dosing doesn’t replenish. Coral Magazine’s coverage of SPS reef chemistry management describes ICP testing as “the diagnostic tool that separates reactive parameter chasing from proactive system management.”
The practical implication: if you’re seeing alkalinity drift even with an ATO running, the problem isn’t the ATO — it’s the consumption side. Calculate your coral’s daily alkalinity demand (Advanced Aquarist’s reef chemistry guides include worksheets for this), then size your dosing accordingly.
Decision Frame: Which ATO Setup for Which Build?
The honest answer is that ATO selection is mostly a reliability and integration decision, not a chemistry decision. The chemistry work happens in your dosing regimen. The ATO just has to work every day without flooding your stand or running dry.
If your tank is under 40 gallons: A single optical sensor ATO with a 2–3 gallon reservoir is sufficient. Look for units with a pump-runtime safety cutoff — a setting that shuts the pump off if it runs continuously for more than a set number of seconds, catching sensor failures before they become floods. Owners on Reef2Reef consistently rate this feature as the most-used safety backstop on smaller tanks.
If your tank is 40–120 gallons: Step up to a dual-sensor unit. The cost delta between single and dual sensor is typically $50–$80 at retail, and the flood-prevention value of that second sensor is asymmetric — you only need it once. Pair it with a reservoir large enough for 4–7 days of autonomous operation based on your calculated evaporation rate.
If your tank exceeds 120 gallons or is a display/commercial installation: Integrate the ATO into your broader controller ecosystem (Neptune Apex, GHL Profilux, or Hydros). Controller-integrated ATOs allow the system to cross-check water level sensor data against float alarms, skimmer neck sensors, and sump-level probes simultaneously, reducing false-trigger risk. They also log pump runtime data, which makes drift detection straightforward — a sudden increase in daily pump cycles is an early warning of a leak or increased evaporation before parameters show the effect.
If you’re in a rental unit or commercial space without a floor drain nearby: Prioritize units with external overflow alarm contacts that can trigger a smart plug cutoff or building management alert. A 75-gallon overflow in a hotel lobby is a different category of problem than one in a residential fishroom.
The Bottom Line
Alkalinity stability isn’t a single-product fix — it’s a system. But the system has a logical build order, and an ATO is the first component that has to be right. An unreliable or undersized top-off is a chemistry problem masquerading as a hardware problem: every manual correction you make to dKH drift is partially fighting evaporation-driven concentration swing, not just coral consumption.
Get the ATO layer right — correct sensor architecture for your tank size, adequate reservoir for your evaporation rate, pump head pressure matched to your stand geometry — and you’ve eliminated the highest-frequency source of parameter instability in reef keeping. Everything downstream (dosing, ICP testing, calcium reactor tuning) gets easier and more predictable when the baseline isn’t moving on you daily.
Decision rule: If your alkalinity tests show variance greater than 0.5 dKH between morning and evening readings, rule out evaporation as the driver before adjusting your dosing. Run your ATO continuously for one week, test at consistent times, and re-evaluate. Alkalinity stability almost always starts with volume stability — and volume stability starts with the ATO.